

Building an ADF Pipeline with a Copy Data Activity
The first step in creating an ADF pipeline through the Azure Data Factory Studio is to navigate to the Author page by clicking either the Author button on the left-side toolbar or the Orchestrate button on the home page. The left pane on the Author page contains a tree view named Factory Resources. From here, you can create or navigate through existing pipelines, datasets, mapping data flows, or Power Query activities by clicking the + button or the ellipsis (…) next to each menu item. Figure 5.23 illustrates how to create a blank pipeline by clicking the + button.

FIGURE 5.23 Creating a blank ADF pipeline
After you click Pipeline, a blank pipeline canvas will open with a new toolbar on the left side of the canvas that contains every activity that can be added to the pipeline. Any of these activities can be dragged from the Activities toolbar and dropped onto the central canvas to build out the pipeline. At the top of the canvas there are buttons to validate the pipeline for any errors, debug the pipeline, and add a trigger to the pipeline. On the right side of the canvas is the Properties tab where you can add a friendly name and a description for the pipeline. At the bottom of the canvas there are options to create new parameters and variables that can make pipeline runs more dynamic. Figure 5.24 illustrates each of these components with a friendly name added in the Properties tab.
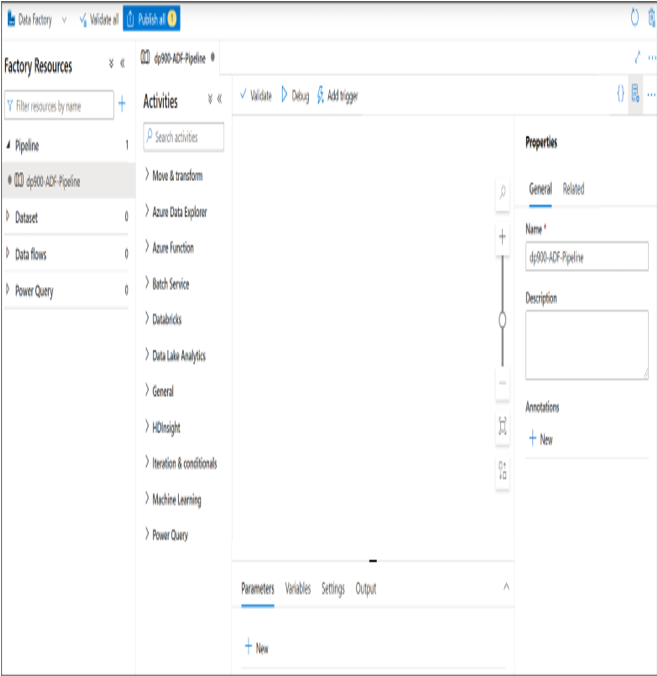
FIGURE 5.24 The ADF Pipeline Creation page
To add a copy activity, expand the Move & Transform option in the Activities toolbar and drag the Copy Data activity to the canvas. The new activity will include six configuration tabs that will be located at the bottom of the tab. The first tab (General tab) allows you to provide a friendly name and description for the activity as well as time-out and retry settings. Figure 5.25 is an example of this view with a friendly name that describes the activity’s functionality.
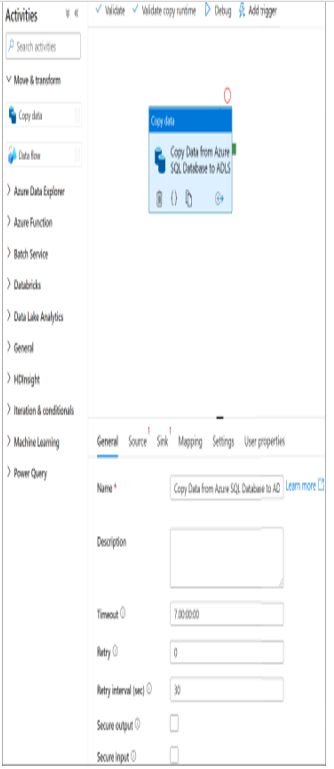
FIGURE 5.25 Copy Data Activity: General tab
Out of the six copy activity configuration tabs, only two of them require user input: the Source tab and the Sink tab. These two tabs will define the source dataset and the destination, or sink, dataset that the data is being copied to. The Source tab allows you to choose an existing dataset or create a new one. If you click the + New button, a new page will open where you can choose from one of the available data source connectors (see Figure 5.26).

FIGURE 5.26 New Dataset page
In the search bar, type Azure SQL Database and choose the Azure SQL Database connector. Click Continue at the bottom of the page to open the Set Properties page for the dataset. This page allows you to set a friendly name for the dataset and choose/create the linked service that will be used to connect to the data source. Expand the Linked Service drop-down menu and click + New to create a linked service for the database. This will open a new page where you can set a friendly name for the linked service, the integration runtime, and the connection information for the database. Figure 5.27 is a completed example of the New Linked Service page for an Azure SQL Database.
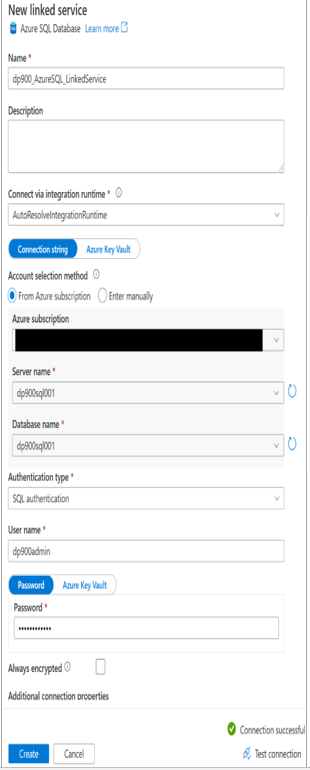
FIGURE 5.27 New linked service page: Azure SQL Database
Once the settings for the linked service are properly set, click the Create button to create the linked service and to be redirected to the Set Properties page for the dataset. With the linked service defined, the next step will be to either choose the table or view that the dataset will represent or leave the Table Name setting blank. For the purposes of this example, we will choose the SalesLT.ProductCategory table. Figure 5.28 is a completed example of the Set properties page.
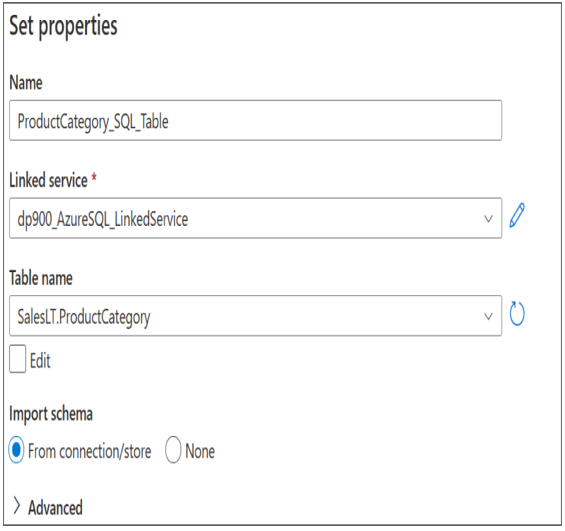
FIGURE 5.28 Set properties page for a new dataset: Azure SQL Database
After you click OK at the bottom of the Set Properties page, the dataset will be created and added as the source dataset in the copy activity. Because the source dataset is an Azure SQL Database, the Source tab includes several optional settings that are tailored to relational databases. For example, if you did not choose a table or view in the dataset tab, you can use a query or a stored procedure to define the dataset. You can also parameterize this setting so that the dataset varies based on the value passed to the parameter. Figure 5.29 illustrates the list of options that are available in the Source tab for an Azure SQL Database.
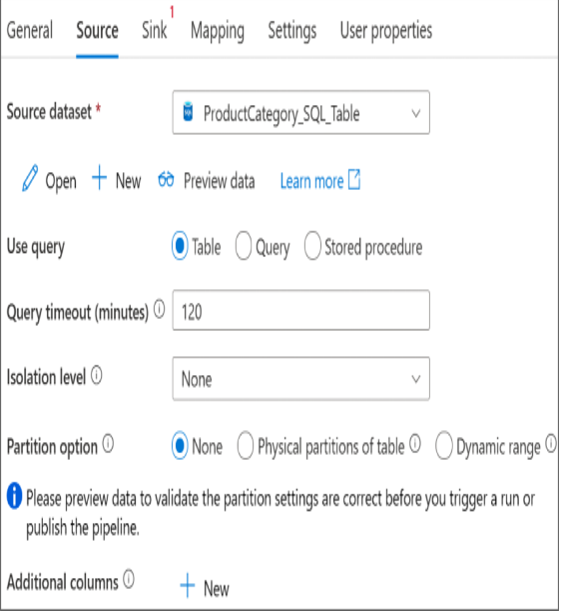
FIGURE 5.29 Copy Data Activity: Source tab
Leave a Reply